OpenHarmony 4.0 SDK Compilation
Document Revision History
| Version | Revision Content | Revised By | Reviewed By | Date |
|---|---|---|---|---|
| V1.0 | Created document | 2024/8/20 |
1. Source Code Acquisition
OpenHarmony 4.0 Release Version Features: For detailed release notes, refer to: https://gitee.com/openharmony/docs/blob/master/zh-cn/release-notes/OpenHarmony-v4.0-release.md
1.1 Acquiring the Source Code
Execute the following commands on your PC-side Linux host:
mkdir -p OpenHarmony-v4.0-Release && cd OpenHarmony-v4.0-Release
repo init -u https://gitee.com/openharmony/manifest -b refs/tags/OpenHarmony-v4.0-Release --no-repo-verify
repo sync -c
repo forall -c 'git lfs pull'2
3
4
Important Note: Ensure that you are acquiring the source code that matches exactly with the version release. If the source code differs, patching may encounter issues.
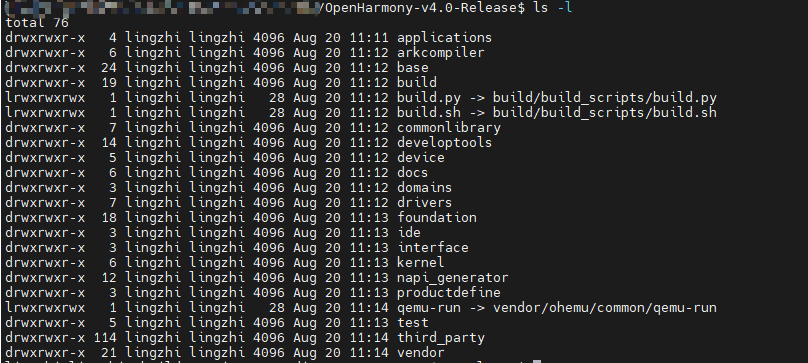
The SDK files obtained will look like this:
1.2 Patching
Step 01: Download the Patch
Patch download link: Download Center (Click to Jump 🚀)

Step 02: Copy the Patch
opy the downloaded patch file to a directory of your choice.
Step 03: Apply the Patch
Run the following commands:
# Extract the installation package
tar zxvf OpenHarmony-v4.0-Release-xxxx.tar.gz

# Copy the patch files to OpenHarmony-v4.0-Release
cp -arfP OpenHarmony-v4.0-Release-xxx/* /home/test/OpenHarmony-v4.0-Release/2
3
4
5
Note: In the above copy command, /home/test/OpenHarmony-v4.0-Release refers to your local OpenHarmony directory path. Please adjust this according to your actual setup.
2. Environment Setup
Recommended host configuration for compilation:
- Ubuntu20.04 LTS
- 64-bit CPU
- At least 12GB of DDR RAM
- At least 512GB of hard drive space
2.1 Install Docker
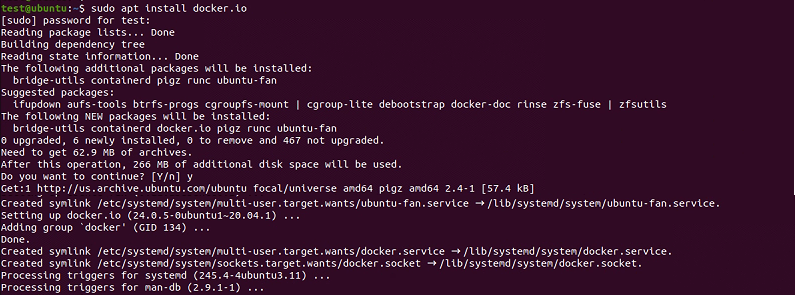
Execute the following command in the command-line terminal:
sudo apt install docker.ioThe installation result should appear as shown below:
2.2 Download the Docker Image
Execute the following command in the command-line terminal:
sudo docker pull swr.cn-south-1.myhuaweicloud.com/openharmony-docker/openharmony-docker:1.0.0If it fails, use one of the following alternatives:
sudo docker pull swr.cn-south-1.myhuaweicloud.com/openharmony-docker/docker_oh_standard:3.2The result of the command execution should appear as shown below:

3. SDK Compilation
This project uses the Docker compilation method (compared to the Linux compilation method, this approach avoids compilation errors caused by Linux upgrades).
3.1 Create a Docker Container
Assuming the OpenHarmony-v4.0-Release directory is located at /work/OpenHarmony-v4.0-Release, the specific command to create the container is as follows:
sudo docker run -it -v /work/OpenHamrony-v4.0-Release:/home/openharmony swr.cn-south-1.myhuaweicloud.com/openharmony-docker/openharmony-docker:1.0.0If you are using version 3.2, you should also use 3.2 here (choose one):
sudo docker run -it -v /work/OpenHamrony-v4.0-Release:/home/openharmony swr.cn-south-1.myhuaweicloud.com/openharmony-docker/docker_oh_standard:3.2Note:
- The
/work/OpenHamrony-v4.0-Releasepath in the command represents the actual path of the OpenHarmony source code on your PC (Linux). - The
/home/openharmonypath in the command represents the virtual directory of OpenHarmony source code inside the container.
The execution result should appear as shown below:

3.3 Install Compilation Tools
After entering the container, install the tools required to compile OpenHarmony. Use the following commands:
# Move to the OpenHarmony main directory in the container
cd /home/openharmony
# Download the compilation tools
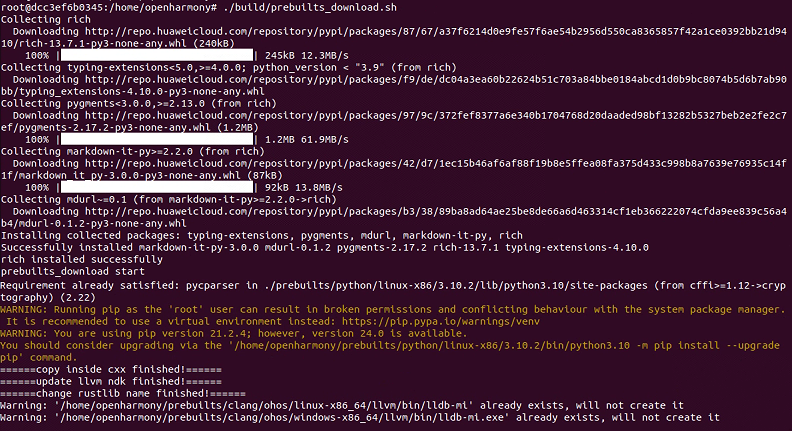
./build/prebuilts_download.sh2
3
4
The execution result should appear as shown below:
To install the hb compilation tool, use the following command in the terminal:
# Move to the OpenHarmony source code main directory in the container
cd /home/openharmony
# Install hb and other tools
pip3 install build/hb
# If the above command does not work, run the following command to install hb (alternative)
python3 -m pip install --user build/lite2
3
4
5
6
Note: The last command should only be used if the second command fails.
The execution result should appear as shown below:

3.4 Select Compilation Branch
In the Docker command line terminal, execute the following command:
# Move to the OpenHarmony main directory in the container
cd /home/openharmony
# Set the OpenHarmony root directory
hb set -root .2
3
4
The execution result should appear as shown below:

Use the up and down arrow keys to select standard, then press Enter.
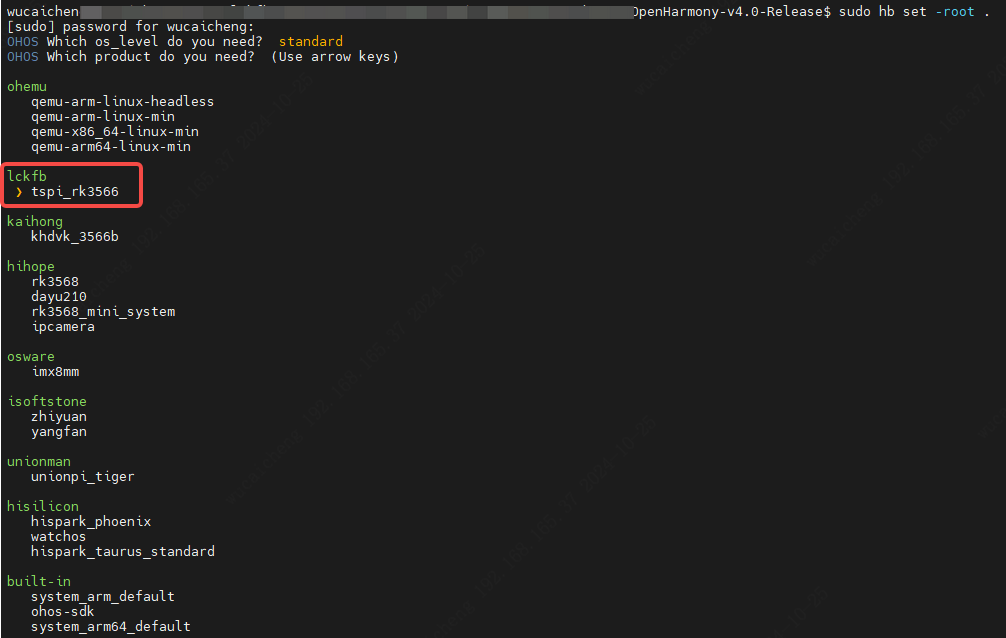
Use the up and down arrow keys to select tspi_rk3566, then press Enter.
3.4 Start Compilation
To force the compilation of OpenHarmony source code in the Docker terminal, execute the following command:
hb build -fAlternatively, you can choose selective compilation (i.e., if already compiled, it will not be recompiled) by executing the following command:
hb buildNote: The first compilation takes a long time, possibly between 2 to 6 hours, so please be patient.
After compilation, the Taishan image will be stored in the OpenHarmony main directory under out/tspi_rk3566/packages/phone/images.
3.5 Re-enter the Container
If you exit the container and want to re-enter, execute the following commands:
# List all containers
docker container ls --all
# Select the corresponding containerID based on the listed containers
docker container start [containerID]
# Attach to the container
docker container attach [containerID]2
3
4
5
6
4. Firmware Flashing
4.1 Hardware Connection
Use a USB cable to connect the Taishan board to the PC as shown below:
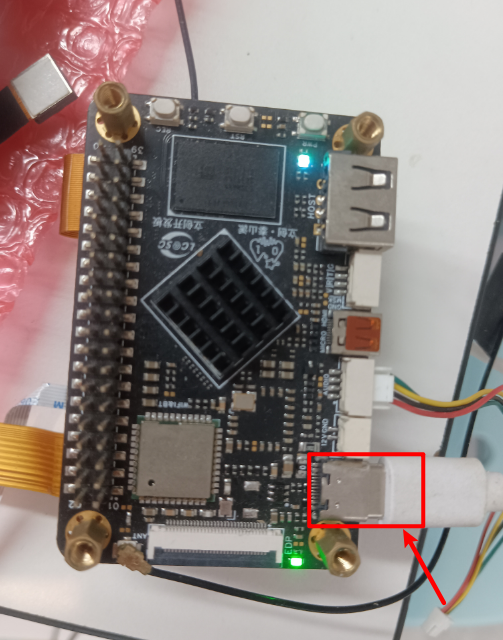
Note: Ensure that the USB port on the PC is the one for the main control board; otherwise, there may be insufficient power, causing failure to boot properly.
4.2 Software Flashing
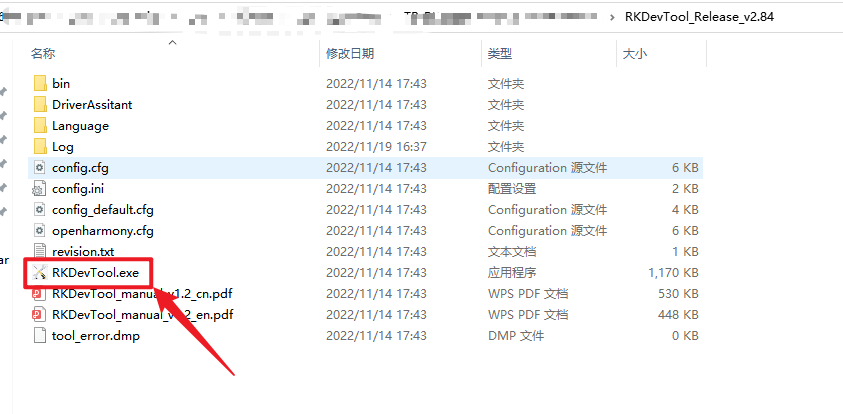
Open the flashing tool, RKDevTool, by clicking on RKDevTool.exe as shown below:
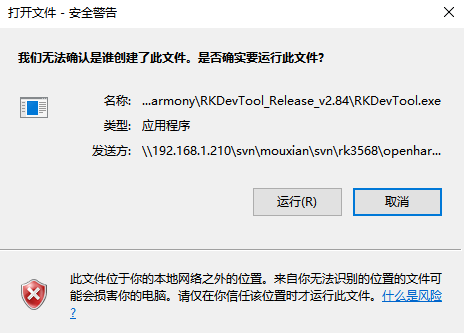
Click "Run" as shown below:
Right-click on the blank area to bring up the menu and select "Import Configuration" as shown below:
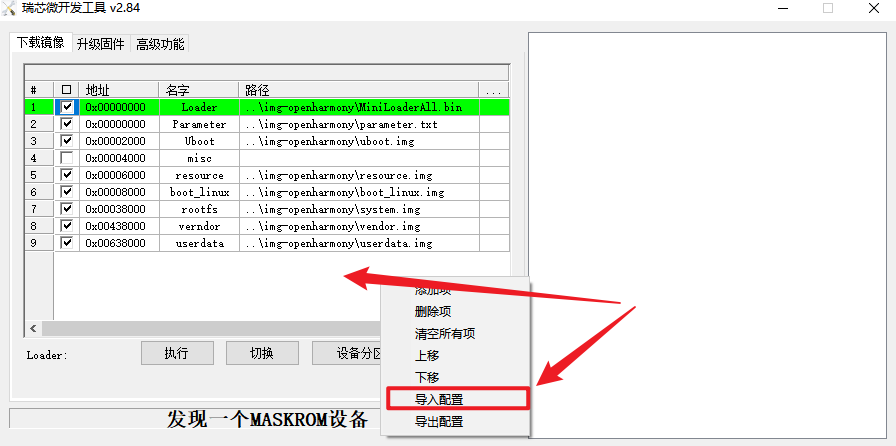
Select out/tspi_rk3566/packages/phone/images and choose the "config.cfg" file as shown below:
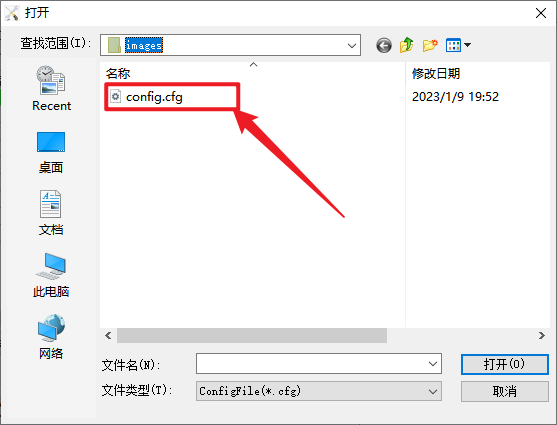
Click on the location indicated by the red arrow to select the compiled file, as shown below:
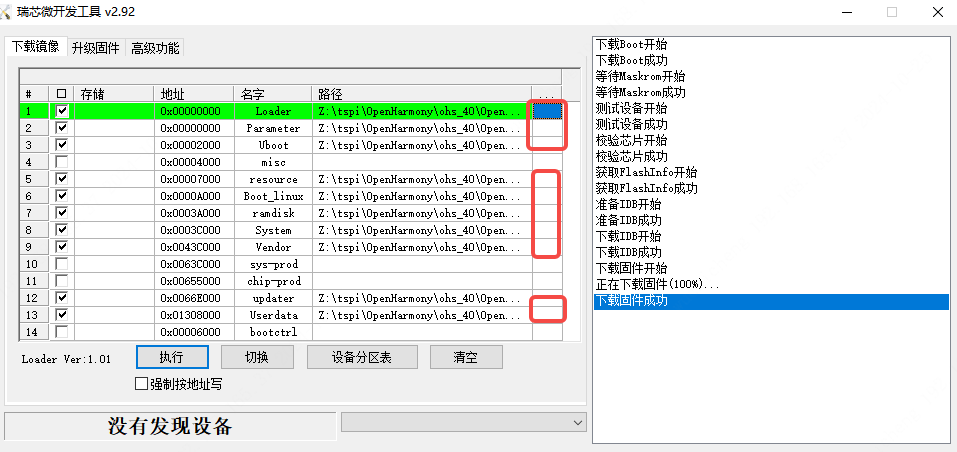
The compiled image file is stored in the out/tspi_rk3566/packages/phone/images directory.
The correspondence between the flashing tool and actual image files is as follows:
| No. | Flash Tool Name | Image File Name |
|---|---|---|
| 1 | Loader | MiniLoaderAll.bin |
| 2 | Parameter | parameter.txt |
| 3 | Uboot | uboot.img |
| 4 | resource | resource.img |
| 5 | Boot_linux | boot_linux.img |
| 6 | ramdisk | ramdisk.img |
| 7 | System | system.img |
| 8 | Vendor | vendor.img |
| 9 | updater | updater.img |
| 10 | userdata | userdata.img |
Press and hold the REC button, then press the RST button as shown below:
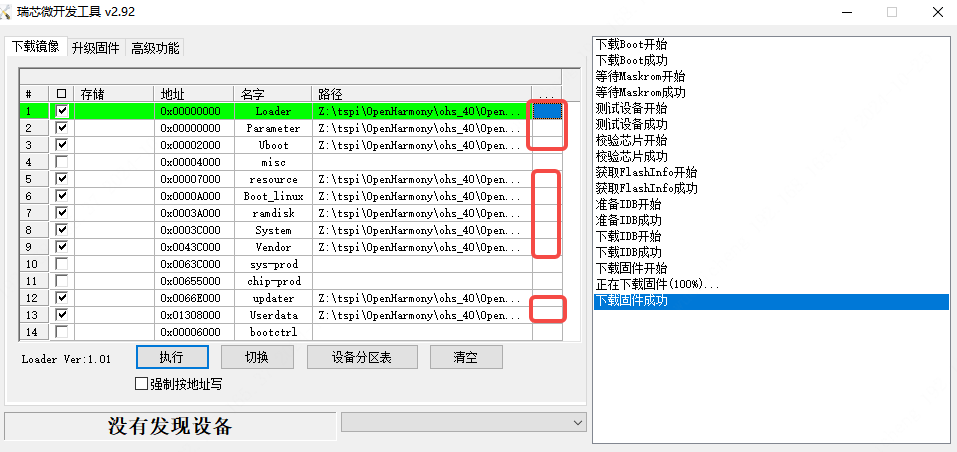
At this point, the flashing tool will display "Found a LOADER device" as shown below:
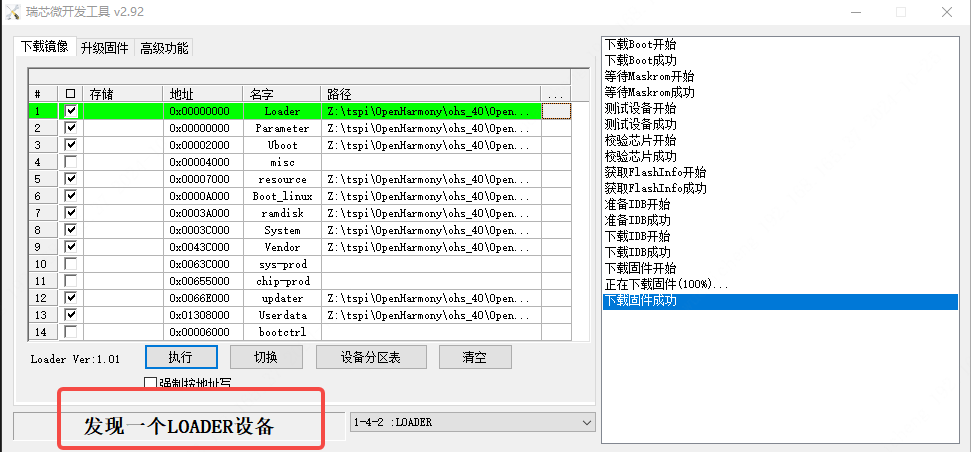
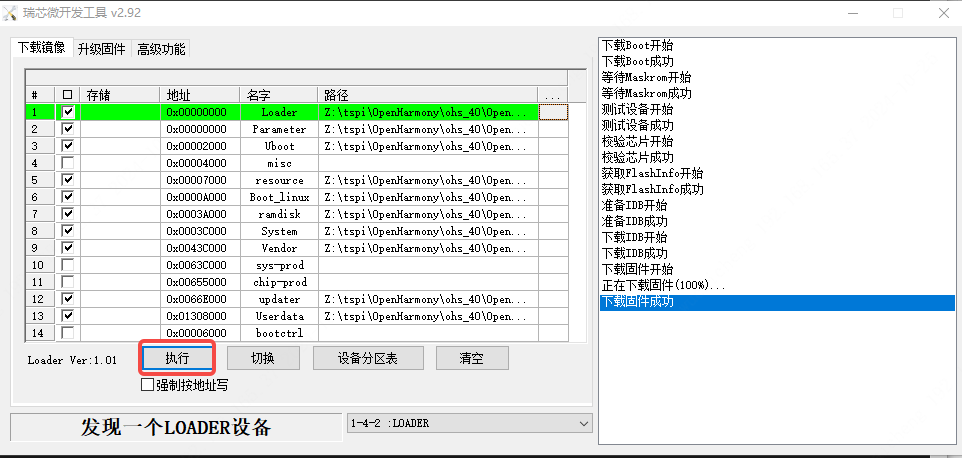
Click "Execute" to start the download process as shown below:
5. Feature List
| Hardware Interface | Supported | Description |
|---|---|---|
| Debug UART | [✓] | 参数1500000,n,8,1 |
| MIPI Display | [✓] | |
| Touchscreen | [✓] | |
| HDMI LCD Screen | [✓] | |
| Camera | [✓] | |
| WiFi | [✓] | |
| Bluetooth | [✓] | |
| Speaker | [✓] | |
| Microphone | [✓] | |
| RGB LED | [✓] | |
| USB 2.0 | [✓] | |
| USB 3.0 | [✓] | |
| Ethernet Port | [✓] | |
| TF Card | [✓] |
Additionally, the ribbon cable pin configuration is as follows:
| Multiplexed Function | GPIO | Pin Number | Pin Number | GPIO | Multiplexed Function |
|---|---|---|---|---|---|
| 3.3V | 3.3V | 1 | 2 | 5V | 5V |
| I2C2_SDA_M0 | GPIO0_B6 | 3 | 4 | 5V | 5V |
| I2C2_SCL_M0 | GPIO0_B5 | 5 | 6 | GND | GND |
| GPIO | GPIO1_A4 | 7 | 8 | GPIO3_B7 | UART3_TX_M1 |
| GND | GND | 9 | 10 | GPIO3_C0 | UART3_RX_M1 |
| GPIO | GPIO3_A1 | 11 | 12 | GPIO3_C4 | PWM14_M0 |
| GPIO | GPIO3_A2 | 13 | 14 | GND | GND |
| GPIO | GPIO3_A3 | 15 | 16 | GPIO3_A4 | GPIO |
| 3.3V | 3.3V | 17 | 18 | GPIO3_A5 | GPIO |
| SPI3_MOSI_M1 | GPIO4_C3 | 19 | 20 | GND | GND |
| SPI3_MISO_M1 | GPIO4_C5 | 21 | 22 | GPIO3_A6 | GPIO |
| SPI3_CLK_M1 | GPIO4_C2 | 23 | 24 | GPIO4_C6 | SPI3_CS0_M1 |
| GND | GND | 25 | 26 | GPIO3_A7 | |
| I2C3_SDA_M1 | GPIO3_B6 | 27 | 28 | GPIO3_B5 | I2C3_SCL_M1 |
| GPIO | GPIO3_B0 | 29 | 30 | GND | GND |
| GPIO | GPIO3_C2 | 31 | 32 | GPIO3_C5 | PWM15_IR_M0 |
| PWM8_M0 | GPIO3_B1 | 33 | 34 | GND | GND |
| PWM8_M0 | GPIO3_B2 | 35 | 36 | GPIO3_C3 | GPIO |
| GPIO | GPIO0_B7 | 37 | 38 | GPIO3_B3 | GPIO |
| GND | GND | 39 | 40 | GPIO3_B4 | GPIO |
6. FAQ
6.1 Directory Overview
| Directory Name | Purpose | Notes |
|---|---|---|
| /vendor/lcsc/tspi_rk3566 | Stores configurations and code for the Taishan board | |
| /device/board/lcsc/tspi_rk3566 | Stores the configuration and code for the Taishan dev board | |
| /device/soc/rockchip/rk3566 | Stores public code related to the Rockchip RK3566 chip | |
| /kernel/linux/config/linux-5.10/tspi_rk3566 | Stores kernel configurations for the Taishan board | |
| /kernel/linux/patches/linux-5.10/tspi_rk3566_patch | Stores the HDF driver code and Linux kernel code modifications for the Taishan dev board |
6.2 MIPI Display Support
o compile, edit the /kernel/linux/patches/linux-5.10/tspi_rk3566_patch/kernel.patch file with the following modifications:
+// [Enable/Disable] HDMI display configuration. The contents here can generally remain unchanged. Simply comment it out if HDMI display is not required.
+//#include "tspi-rk3566-hdmi-v10.dtsi"2
Note:
- Only add
+before#include "tspi-rk3566-dsi-v10.dtsi" - Add
+//before#include "tspi-rk3566-hdmi-v10.dtsi"
6.3 HDMI Display Support
To compile, edit the /kernel/linux/patches/linux-5.10/tspi_rk3566_patch/kernel.patch file with the following modifications:
+// [Enable/Disable] MIPI display configuration, users can replicate their own screen based on this. Note: EDP and MIPI screens are mutually exclusive since they share the VOP. Modify if you need both displays.
+//#include "tspi-rk3566-dsi-v10.dtsi"

+// [Enable/Disable] HDMI display configuration. The contents here can generally remain unchanged. Simply comment it out if HDMI display is not required.
#include "tspi-rk3566-hdmi-v10.dtsi"2
3
4
5
Note:
- Only add
+//before#include "tspi-rk3566-dsi-v10.dtsi" - Add
+before#include "tspi-rk3566-hdmi-v10.dtsi"