Downloading Corresponding Image
Use Network Disk🚀 to download the provided .img image file in the System Image/Ubuntu24/ directory.
The image used in this document is: TaishanPi-3M-RK3576_Ubuntu24-Xubuntu_AP6256-mSATA.img
Basically all images have TF card support enabled by default, so you don't need to specifically download a particular image.
Inserting TF Card
Our TF card slot is located on the back of the board, with the SIM card slot one above the other (TF card on top, SIM card on bottom):
Flashing Image to Development Board
Reference Finished Image Flashing to flash the downloaded image to the development board.
Using TF Card
Note: The password for user
lckfbislckfb
After the system starts, we have two ways to use the TF card:
1⃣ You can see the newly added SD card disk icon on the desktop. Double-click to let the system automatically mount it, then you can access the files on the card.
After double-clicking, a password input window will pop up. Enter the
lckfbpassword to authorize mounting and then you can access it.The default mount location is
/media/lckfb/<device_name>. You can also access the TF card files through the file manager by navigating to this directory.
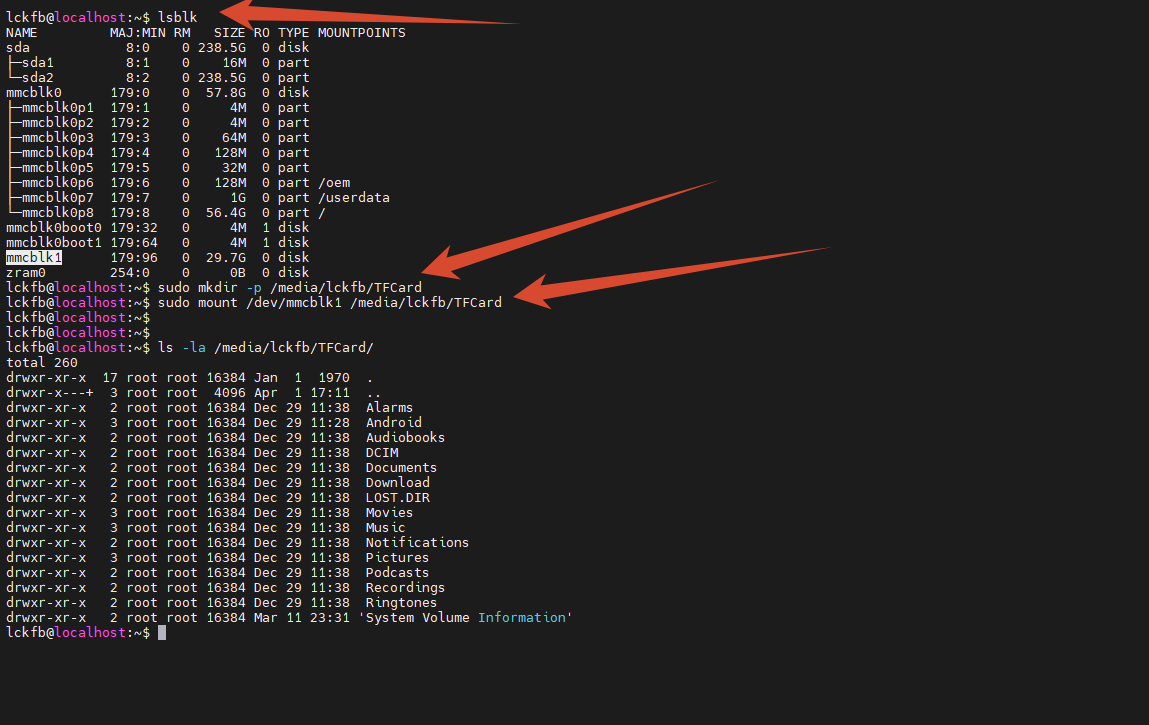
2⃣ You can also open the terminal and mount it manually.
Check if the TF card is recognized by looking for a device with similar capacity:
lsblkThen create a mount directory and mount:
sudo mkdir -p /media/lckfb/TFCard
sudo mount /dev/sda1 /media/lckfb/TFCardNavigate to the mount directory to access the files on the TF card.